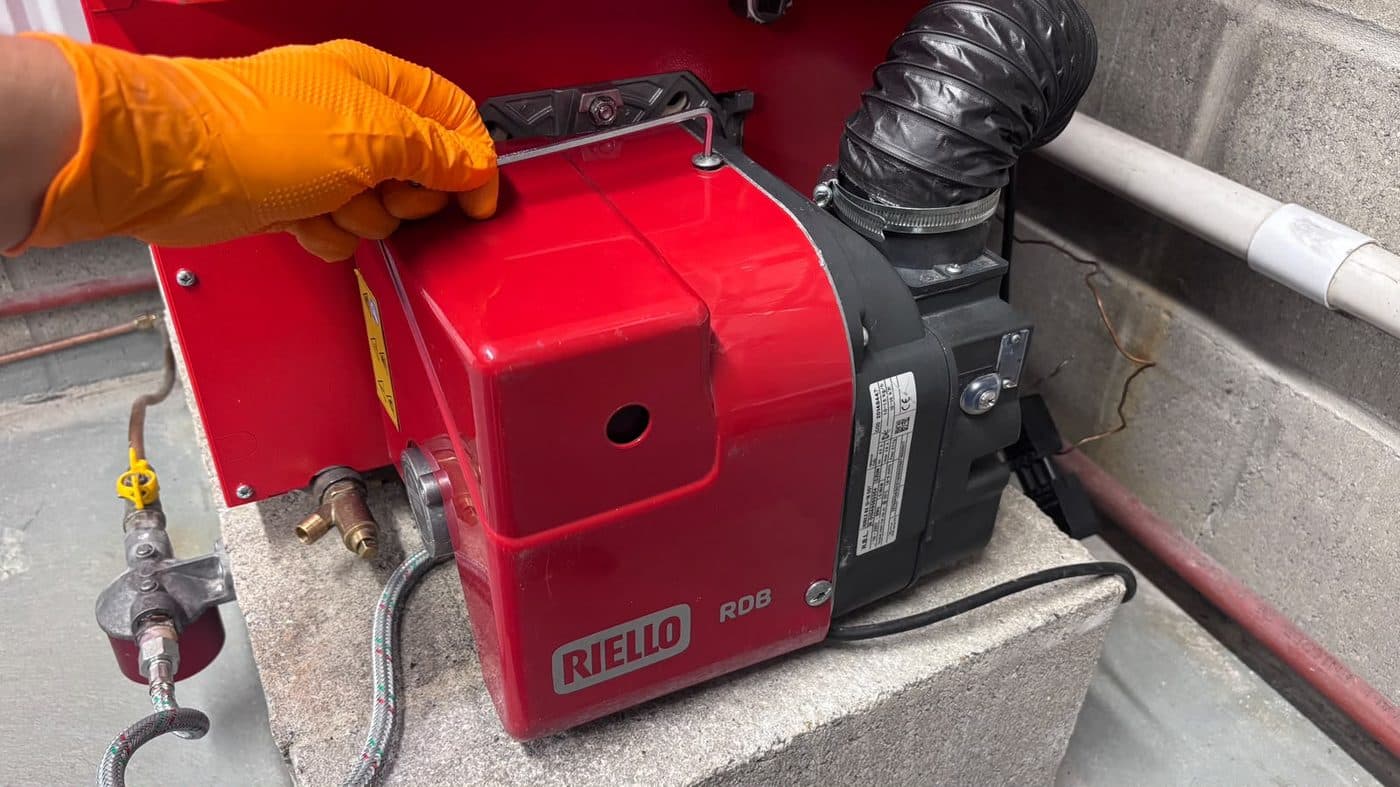
Step 1
Loosen the screws and remove the red Riello cover.

Use this photo guide to test a Riello oil burner photocell with BurnerCheck. Work through each step in order.
Step 1
Loosen the screws and remove the red Riello cover.
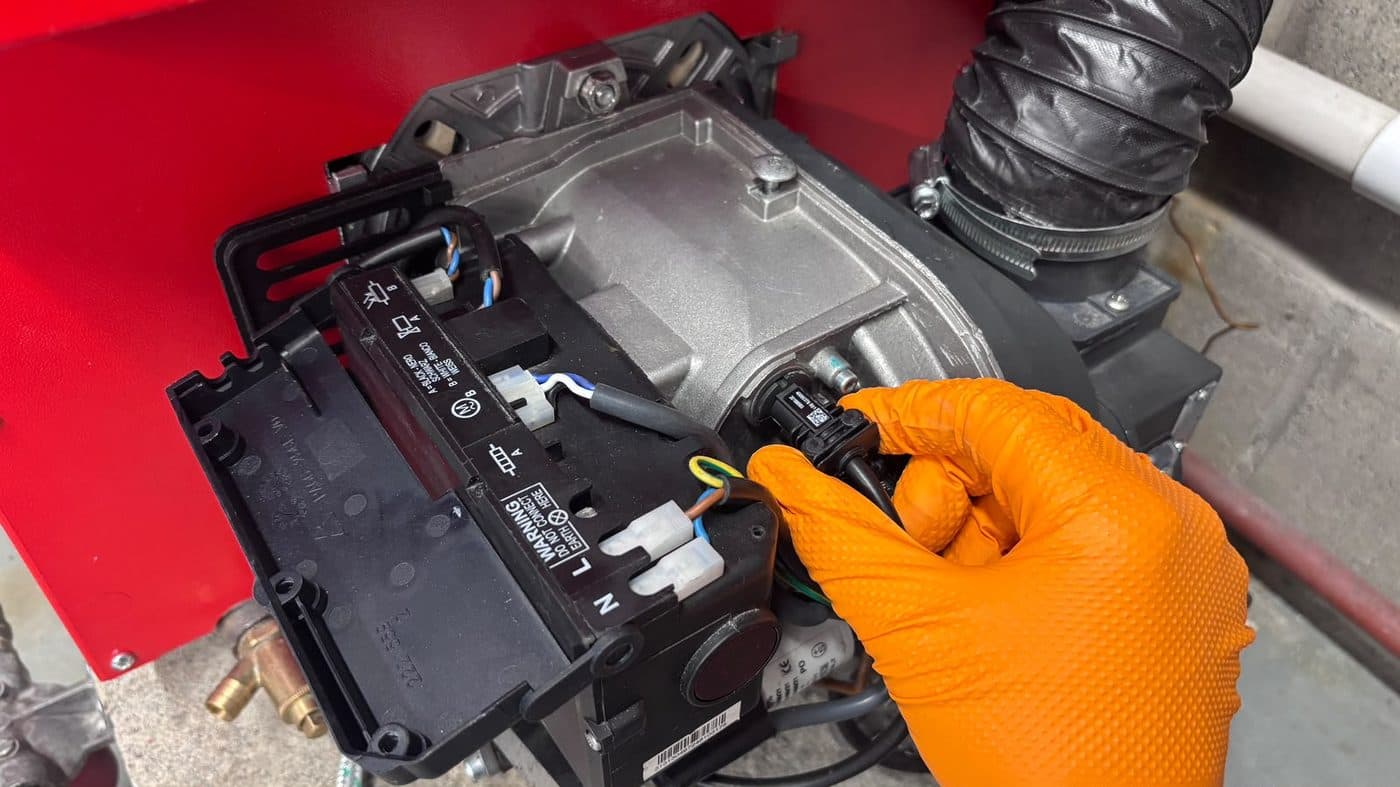
Step 2
Locate and remove the photocell probe in the burner housing.
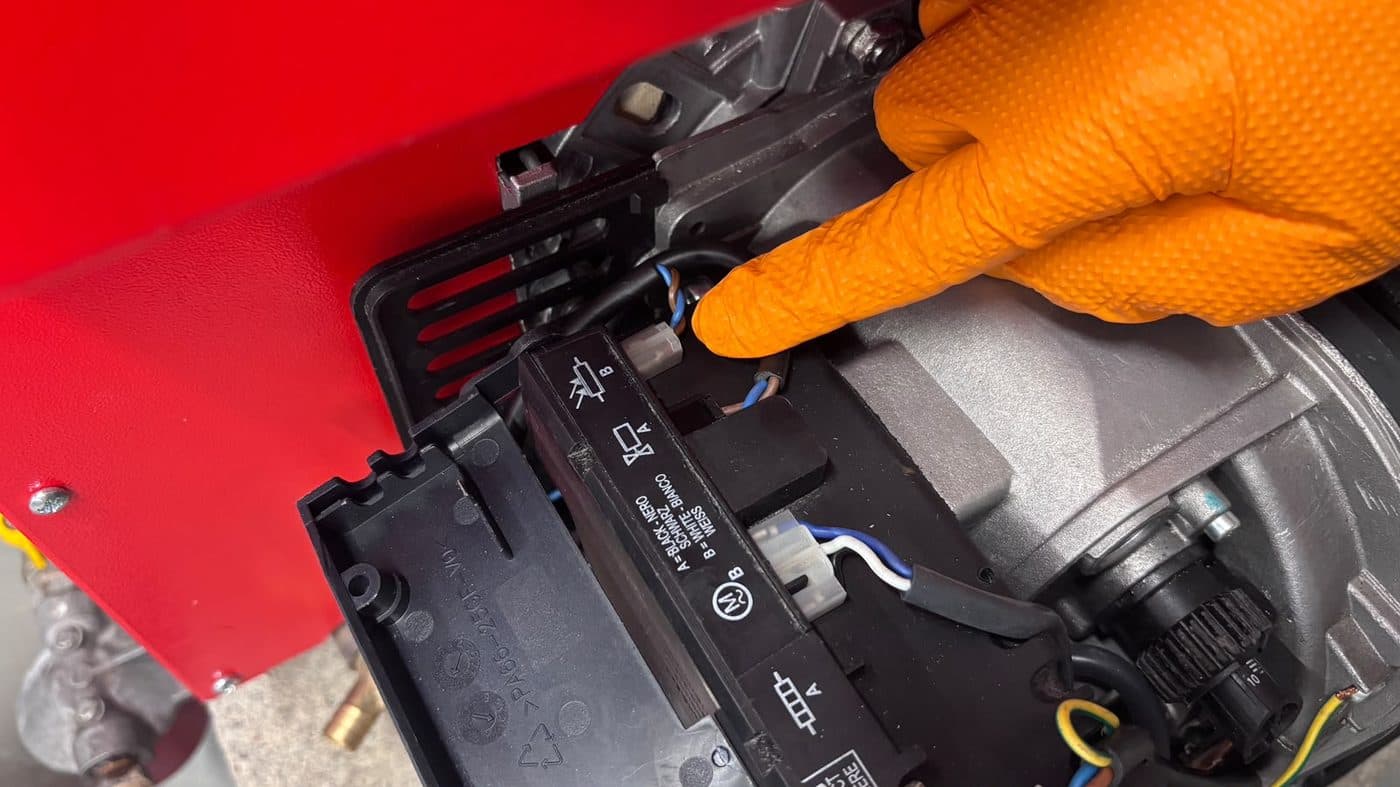
Step 3
Unplug the photocell connector — it's the final slot with a B above it.
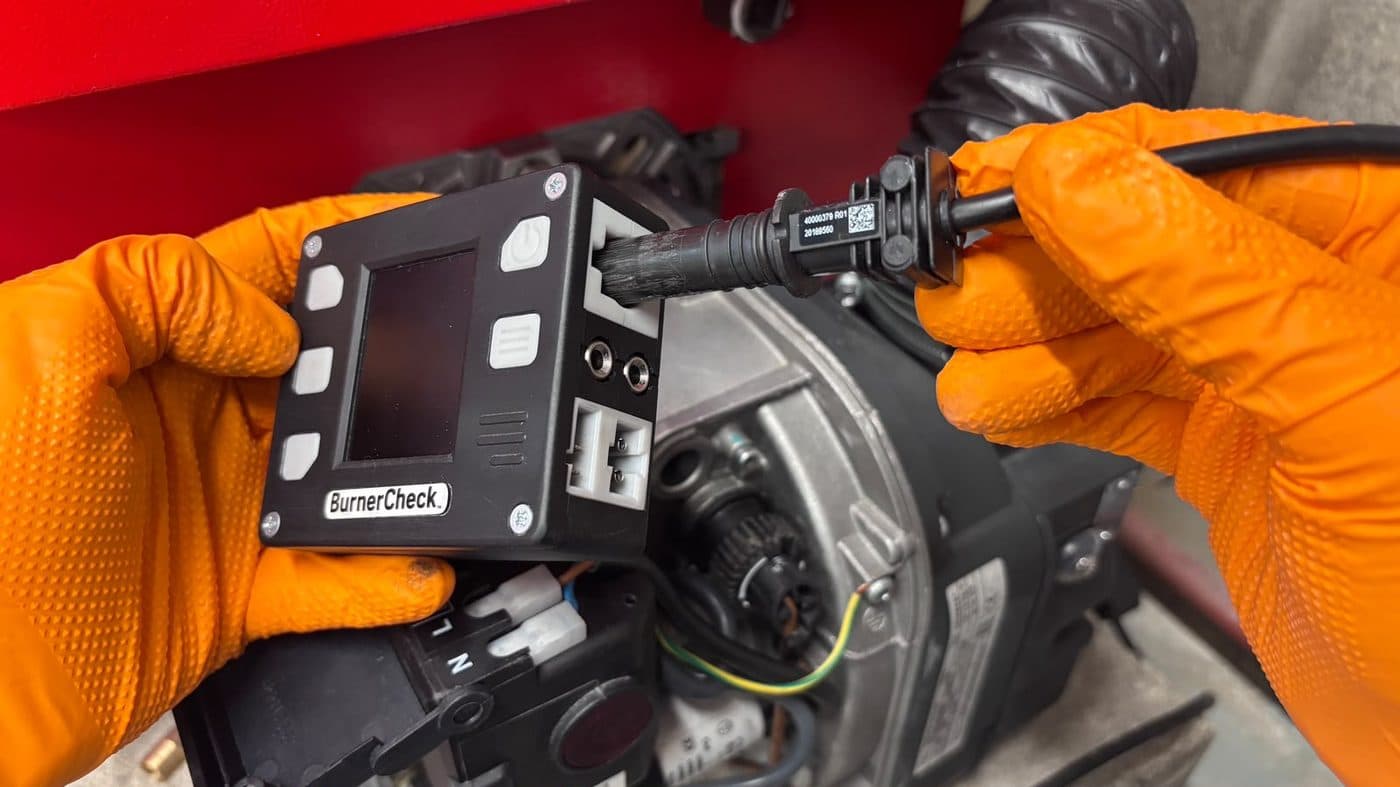
Step 4
Plug the photocell probe into the Photocell test port on the BurnerCheck.
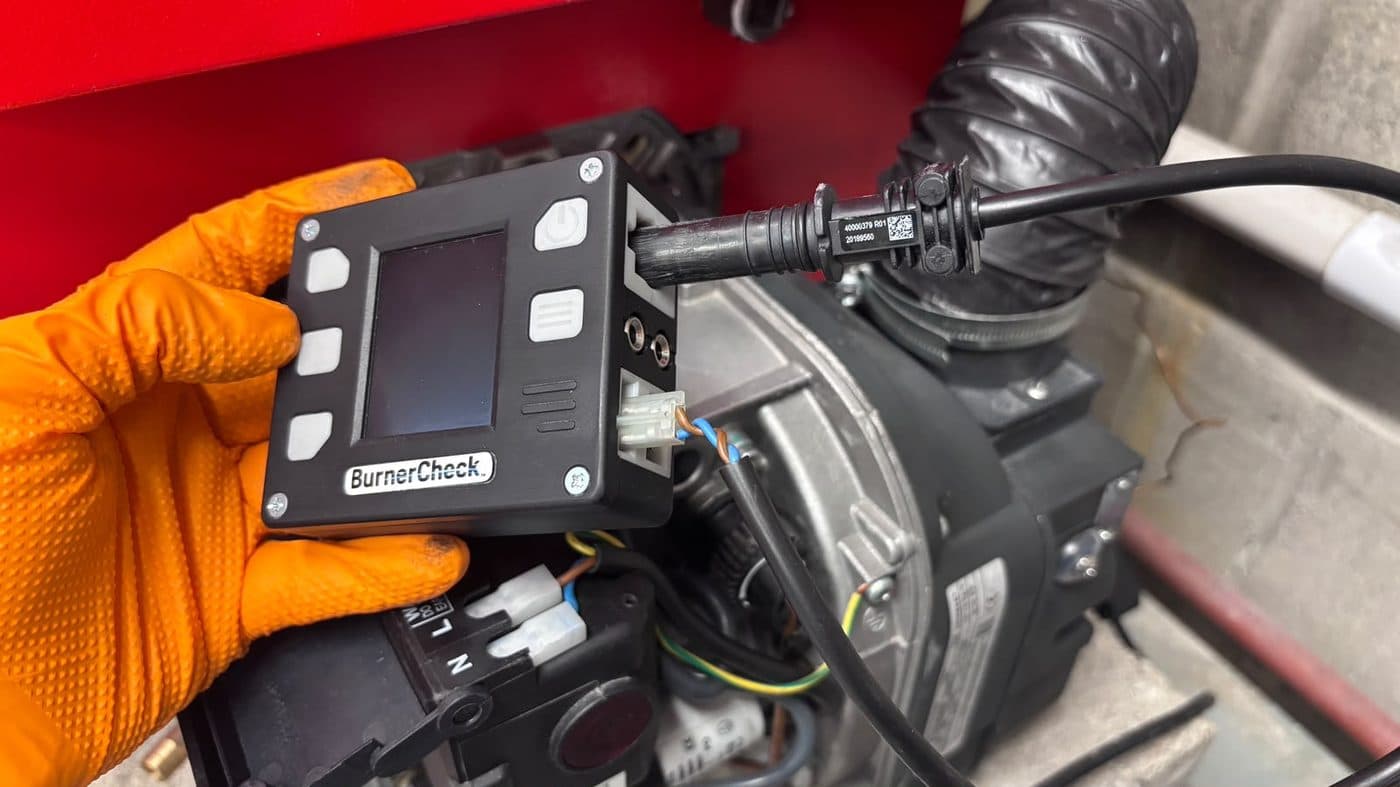
Step 5
Plug the photocell connector into the upper left Riello test port.
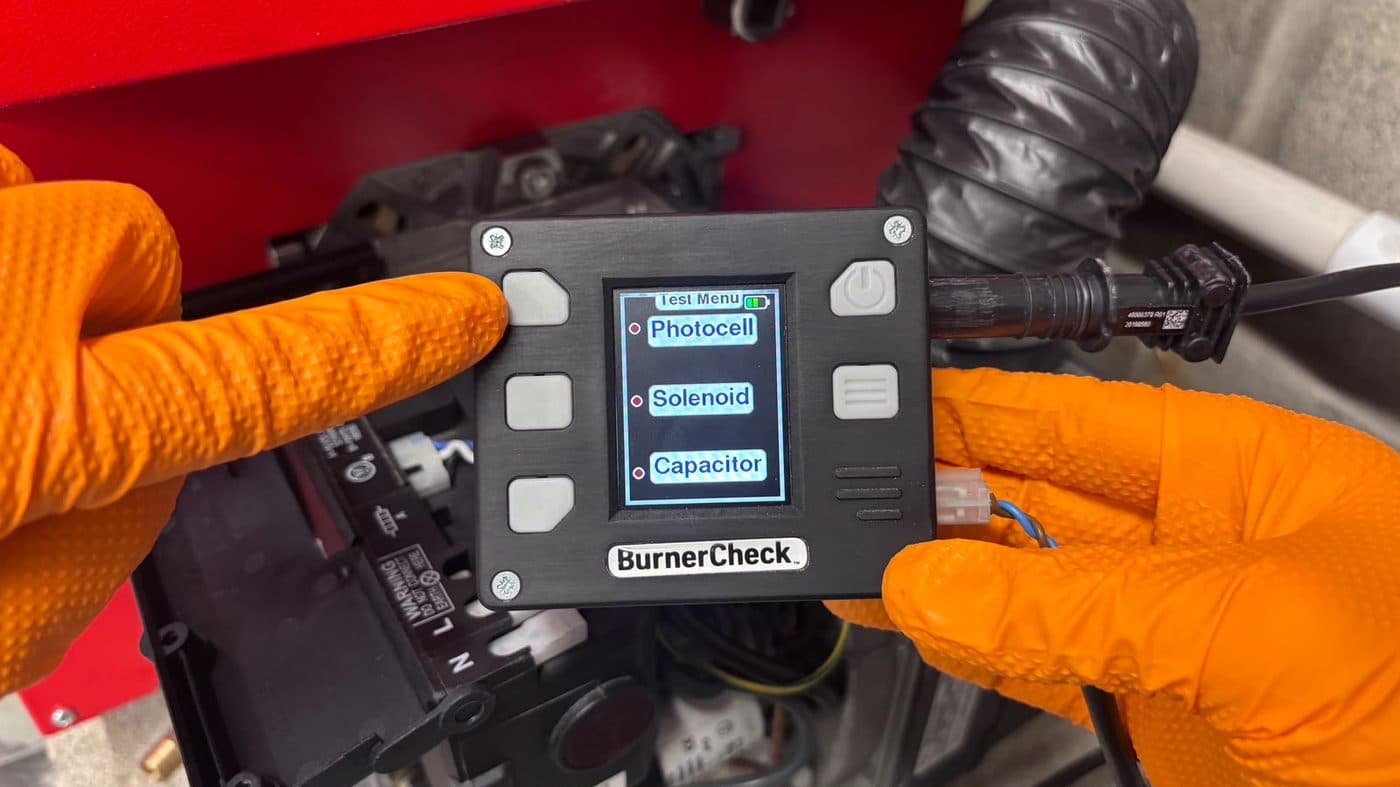
Step 6
Start the test by selecting Photocell on the Test menu.
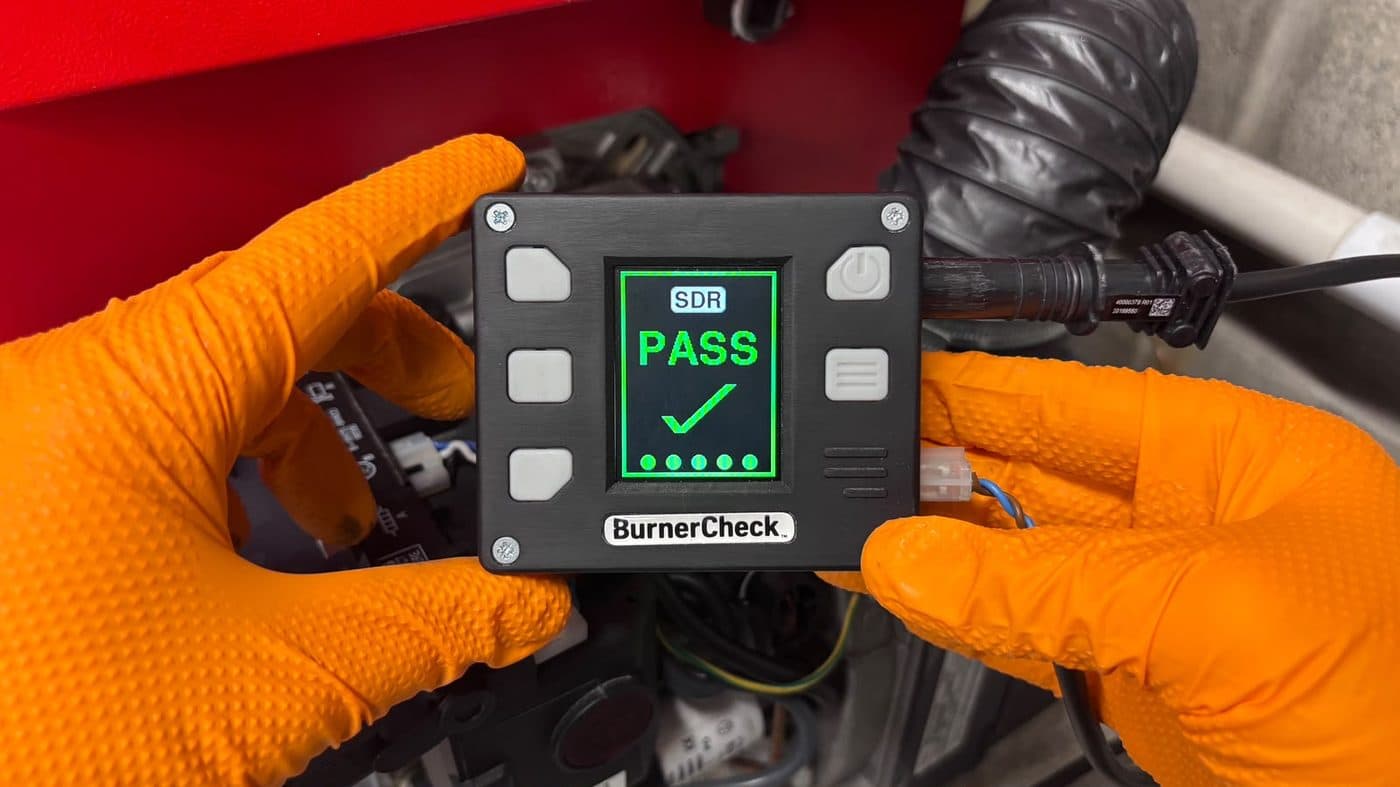
Step 7
The BurnerCheck will display a PASS, WEAK or FAIL result depending on the photocell's condition.